
How To - Tie A Slim Maggot Rig For Silverfish
The slim maggot rig is a highly effective setup for targeting silverfish, offering a natural presentation that tempts even the wariest fish. In this guide, you'll learn how to tie the perfect slim maggot rig and how to fish it for maximum success. Whether you're fishing on canals, lakes, or rivers, mastering this rig will help you catch more silverfish with ease.
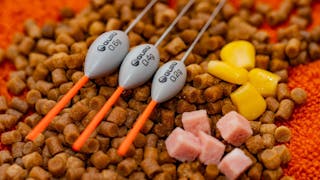
Grab your float
Grab your float; a 0.35g Slim Maggot float is a great all-round pattern!

Grab your mainline
The mainline choice is 0.12mm N-Gauge Super Natural, which is thin yet strong for its diameter and great for presentation.

Begin tying the rig
Pass the line through the eye of the float

Grab your silicone tubing
The 0.3mm silicone in the silverfish pack is perfect for this float. Trim the silicone into 3 pieces, with the final piece slightly longer than the others. This will be the silicone at the bottom of the float.

Thread your silicone on your line
Pop the 3 pieces of silicone onto the line, with the largest piece at the bottom.

Now onto your float
Thread them onto your float like this.

Grab your loop tyer
Tie a loop beneath the float using a loop tyer.

Add your shots
Grab some number 11 Micro Shot and pinch the shot next to the loop in the mainline using Shot Pliers. With this float, 7 number 11 shots will be perfect.

Begin marking your line
Place the loop over a pin to keep your line tight like this.

Mark your shot points
Using a marker pen, mark the line where you want to place your shot. Doing this on a rig board ensures that every rig is exactly the same. Pinch the shot onto your line using Shot Pliers on your marked points.

Shoot the float
The Number 10 shot will make a great bulk shot; adding four number 10 Micro Shots should shoot the float correctly.

Check your float
Now time to see if the float is shot correctly. Here's a great tip, pass the loop of your mainline over the bristle of your float, this gives you an even more accurate reading.

Is it correct?
Your rig should look like this, with around half of the bristle showing above the water. If so, time to wrap the rig around your winder, ensuring you have enough line on the rig for the venues you're fishing.


How To – Tie A Bomb Rig
Here’s a guide on how to tie the perfect Bomb Rig

How To - Use A Speed Bander
This handy tool maximises fishing time and improves bait presentation, helping you catch
How To – Set Up An Elasticated Feeder
Here’s a step-by-step guide on how to tie the perfect elasticated Hybrid/Method Feeder
How To - Set Up An In-Line Hybrid/Method Feeder
Here’s a step by step guide showing you how to tie the perfect In-line Method/Hybrid

How To – Tie A Helicopter Rig
The Helicopter rig is a fantastic set up for natural water feeder fishing. Here's how to

How To - Tie Matt Godfrey's Free Running Feeder Rig
Matt Godfrey uses this rig in most of his natural water feeder work, here’s how to create

How To – Soak The Perfect Micro Pellets
A guide on how to prepare the perfect micro pellets every time you go fishing.

How To - Mix Paste
Paste fishing is a great method for carp, especially in warm months. Here's how to mix it
How To – Mix The Perfect Groundbait
Achieve that perfect groundbait mix for every match with this how-to guide.

How To - Use Distance Sticks
How to use Distance Sticks and accurately measure and replicate fishing spot distances.

Barbel and chub fishing on the River Thames - Gary Newman
Gary explains the tactics and tackle that he uses

Become A Pellet Waggler Master
All-round expert, Steve Ringer, explores one of the most exciting and effective methods

Bomb Fishing For Carp... WITH BREAD!
How to catch more carp using one of the cheapest and simplest fishing baits out there…
Margin Mayhem
Tanks Tips for Catching big carp down the margins in the warmer months

The Big River Mission!
Matt and Tank, took to the mighty River Trent on a big-fish attack using the flat float!

Up And Down - The perfect combo attack for catching more!
Adam Rooney, explores and explains his favourite combo for a commercial bagging attack!
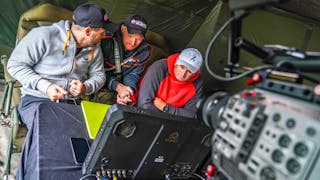
Feeder Fishing Secrets Revealed In "Incredible" Underwater Film
Matt Godfrey, Adam Rooney, and Steve Ringer explore feeder fishing for bream in Underwater
UK Champ Steve Ringer Tackles New Venue With Baits He's "Never Used Before!'
Steve Ringer, the current UK champion, recently fished at a Carpadrome in Belgium.
Andy Bennet's 5 Tips To Improving Your Maggot Fishing This Winter
Andy Bennett's biggest winter maggot fishing tips and tricks.

Gurus Underwater 3 – Andy Bennett and Steve Ringer Pole Fishing Secrets Revealed
Underwater 3, Andy Bennett and Steve Ringer pole fishing on the underwater cameras.

A-Class Poles
An in-depth look at all the poles within the A-Class range

N-Gauge Specimen Reels
Everything you need to know about the N-Gauge Specimen reels

N-Gauge Specimen Rods
The N-Gauge Specimen range of Dual Tip and Barbel rods

Aventus Zero900 and Zero700 Poles
The Aventus Zero700 and Zero900 pole range explained in detail

X-Change Bait Up Rods
Find out everything you need to know about the X-Change Bait Up rods

N-Gauge Poles
An extensive insight into the N-Gauge pole range.
Aventus Steve Ringer Rods
The Aventus Steve Ringer Rods are premium rods for various feeder fishing needs.

Fusion Luggage
Fusion luggage offers versatile, durable storage solutions for various fishing needs.
Guru Pole Float Range
Guru MW Pole Floats are hand-made, durable, high-quality fishing floats for various

Adjustable Rig Cases
The Adjustable Rig Cases offer durable, versatile storage for your hooklengths.